Monday, November 30, 2015

'Tis the Season for Stains

Do you have young, sloppy children? Are you or a loved one accident-prone? Even if you're not particularly careless, between polishing off the Thanksgiving leftovers and starting on the Christmas cookies and other yummy holiday treats, odds are that one of those pieces of deliciousness are going to tumble down onto your beautiful clothing and—BAM!—Stain City.

beforeAfterStain_strawberry
Strawberry stain (bottom) and carrot stain (top) removed after sitting in clothing for over 24 hours.

Well, the mayor of Stain City is about to call in all resources for help because the Godzilla-like monster of stain removers is on his way to smash and demolish said city—don't feel bad for them; they're stains.

simcity_monster
Remember when the 1989 SimCity "monster" attacked,
but we all called him Godzilla?
Come on—who were they trying to fool?

After harnessing the power of the internet and testing them out for myself, I have found two great ways to remove berry stains and grease stains with items you likely already have in your home.


Berry-Be-Banished
So far, I've found this to work very well against strawberry, raspberry and blueberry stains. It even does pretty well against carrot, but occasionally, I have to repeat the process with those more stubborn stains.

I've also noticed that the stain can have been sitting in the fabric for at least a day and will still come out like magic—awesome!

What you'll need:
ingredientProportions
1:1:2 proportions


  • baking soda
  • liquid dish soap (the kind for hand-washing, not for the machine)
  • Hydrogen Peroxide (water works just as well in some cases)

What you'll do:

Mix ingredients together—one part baking soda, one part dish soap and two parts Hydrogen Peroxide.

Store excess solution in a dark container. Hydrogen Peroxide loses its magic when exposed to light. I used the small 8 ounce Hydrogen Peroxide bottle once I was about to run out since it is already nice and dark.

Rinse any excess berry from clothing with water. Apply mixture to stained area, and scrub in thoroughly for a few seconds. Toss into regular wash load (this worked well for me even when on the cold water setting).

IMPORTANT: If you notice the stain is still there after going through the wash, be sure to air dry it instead of throwing it in the dryer. It's not impossible to remove a stain once it has been in the dryer, but the heat helps set the stain and makes it more difficult to remove.

Repeat the mixture applying and laundering process if stain is still present.

beforeAfterStain_raspberry
Raspberry stains removed after sitting in clothing for more than 24 hours.

You can also try a couple of other stain removing combinations from the original source for this process here. I can't vouch for them though since this is the only one I've tried.

And while the original recommends letting the mixture set for up to 24 hours, I found that throwing it in the wash almost immediately was best since there is a chance it could otherwise bleach darker fabrics (so far, no dark fabrics that I have tried this on has bleached at all with my method).


Grease-Go-Gone
I was skeptical about using lighter fluid to remove a grease stain from my husband's jeans, especially because it went through the dryer before we noticed that it was there. But it actually worked.

The original source I found this on said you could also use WD-40, but I have only tried it myself with lighter fluid. There were other alternate methods of removing grease on there as well, but they seemed like more work, and I can say that the lighter fluid worked really well for me.

What you'll need:
lighterFluid
Did it always say that?
I swear I've never noticed before.


  • lighter fluid (some types)* or WD-40
  • laundry detergent

*IMPORTANT: Since only some types of lighter fluid work, make sure yours says something on the container about being good for removing stains. And obviously, don't go putting pretty candles or other open flames near you when doing this.


What you'll do:

Put a piece of cardboard or rag under the clothing where the stain is (this is to keep the lighter fluid from seeping everywhere). Apply lighter fluid completely over stain and let sit for 20** minutes.

**On lighter (both in color and weight) fabrics than denim, I recommend reducing the lighter fluid soaking time to 10 minutes.

Rinse lighter fluid out with water.

Wash separately with laundry detergent.

Done.


beforeAfterStain_grease
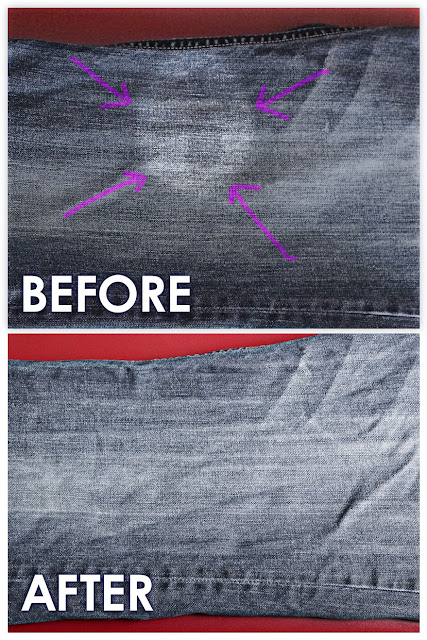
Grease stain removed from jeans even after going through dryer first.

STILL IMPORTANT: If you notice the stain is still there after going through the wash, be sure to air dry it instead of throwing it in the dryer. It's not impossible to remove a stain once it has been in the dryer, but the heat helps set the stain and makes it more difficult to remove.

Wednesday, November 25, 2015

Pumpkin Apple Purée Recipe


This felt like a seasonally topical and easy-to-make baby food purée recipe. I actually ended up making it because I had a leftover can of pumpkin and jar of applesauce after some Thanksgiving baking.

pumpkinApplePuree_bowlAndSpoon
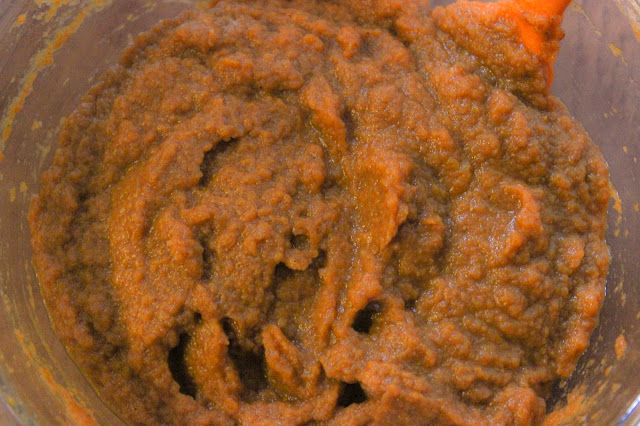
pumpkin apple baby food purée

I have an easier, straight-out-of-the-can recipe, which basically just requires stirring, and an easy but slightly more involved recipe that involves baking/cooking pumpkins and apples.

The quickest and easier first.


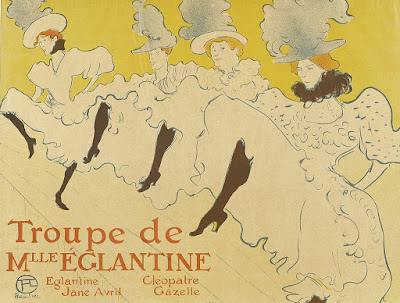
Do the Can-Can!

Can-can_HenriDeToulouse-Lautrec
Depiction of the can-can by Henri de Toulouse-Lautrec, 1895

pumpkinCan_applesauceContainer
INGREDIENTS


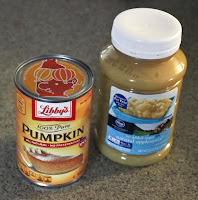
  • One 15 ounce can pumpkin
  • 1 cup unsweetened applesauce
  • Optional spices:
    • cinnamon, nutmeg, ginger, cloves


INSTRUCTIONS

Mix pumpkin and applesauce together in a bowl.

Add as much spice, if any, that you want. No spices are fine, but I like to add something so baby gets used to different flavors. I like a lot of cinnamon and ended up doing about 1–2 teaspoons of cinnamon and ½ teaspoon of pumpkin spice, which contains cinnamon, nutmeg, ginger and cloves. But I recommend tasting it yourself and deciding what combination of spices you like.

iceCubeTray_pumpkinAppleServe up whatever amount is appropriate for your baby's age and store the rest. I like to make a fairly large amount of baby food and freeze the rest in ice cube trays.

It's convenient since each cube is one ounce of food. You just take out however much you need the night before and let it thaw in the refrigerator until it's yum-yum time.

Ice cube tray tip: If you're having trouble getting the frozen cubes out of the tray, run warm water along the back for a few seconds. Then they'll pop right out (thanks for teaching me that trick, Dad).


Bake It 'Til You Make It

INGREDIENTS

  • 2 pumpkins*
  • 3 Gala apples
  • Optional spices:
    • cinnamon, nutmeg, giner, cloves

*The pumpkins I used were the smaller ones you can get at a grocery store that are intended for cooking. Mine were roughly 5 x 5 x 5 inches. I had originally gotten them as my babies' pumpkins for Halloween and painted on them with water soluble acrylic paint instead of carving them.

babiesWithHalloweenPumpkins
Winry and Henry with their Halloween pumpkins. More baby Halloween details here.


INSTRUCTIONS

Set oven to 375 degrees Fahrenheit.

Cut pumpkins in half and remove the stem, pulp and seeds. Set the seeds aside to bake them (I recommend keeping them in for less time than the recipe calls for and checking on them periodically so that they don't burn).

Place the pumpkin halves face down on a baking sheet and cover with foil. Bake for about 1-½ hours or until it is completely soft and tender.

Meanwhile, rinse your apples. Then core and cut them into small pieces (roughly half inch cubes). You can peel the skins if you want. I find that Gala apple skins get plenty soft and baby-eatable after being cooked and puréed, so I don't bother removing them.

Put the apples in a large sauté pan. Fill pan with water until it about halfway covers the apples pieces. Then set the stove to medium-low heat and let simmer until most or all of the liquid has evaporated.

cookedApples
Soft and tender apples

Once the pumpkin and apples are finished baking/cooking, remove pumpkin from its skin. You can use a spoon to scoop it out, but mine was cooked long enough that it practically fell out of the skin on its own.

cookedPumpkinScooping

Add all of the pumpkin and apple pieces into a food processor and blend until desired consistency. You can add whole milk, formula or breast milk while blending if needed—just make sure not to use whole milk until baby is at least one-year-old.

Now follow the instructions under the Can-can section.

Done.

pumpkinApplePuree_closeup


Thursday, November 19, 2015

Boogerbust That Baby!

BoogerBusters

It was around this time last year that I was cleaning my infants' noses out almost daily. And I have a winning combination for booger-busting those young ones who are not yet ready to blow (or pick) their own noses: saline solution (DIY directions at the bottom) and the NoseFrida "the snotsucker" nasal aspirator.

Running with this Ghostbuster analogy, think of the saline solution as the Proton Stream that neutralizes the booger and the nasal aspirator as the Ghost Trap (don't look directly into the trap) that contains the booger until it can be properly disposed of. What's great about the nasal aspirator versus the trap, though, is that you can simply clean it and reuse it instead of disposing it every time you catch a "ghost."
NoseFrida_NasalAspirator

Some of you may have heard about or seen the NoseFrida product before and simply shrugged it off because you think it's strange and icky. Well, I suggest that you grow a pair of reason-perceiving eyes and read on as to why you should suck it up and embrace this brilliant invention—no, I do not regret using a pun to get my point across.

I was like you once. A friend gave me the NoseFrida while I was pregnant and preparing myself for twins-to-come. I thanked her and said that I might give it a go, but deep down, I knew I didn't want to use a snot straw: Why use something scary and new when I have one of those booger bulb things that everyone uses, right? Boo—wrong!

I tried the bulb syringe first. It didn't work and only made my poor, stuffy-nosed baby cry more. Desperate to try anything that would give my babies an easier time breathing, I got over my case of the ickies and gave the NoseFrida a shot. It worked.


SadBulbSyringe
Don't give me that look, Bulb Syringe.
It's not my fault that you're useless and ineffective.

Unlike the bulb syringe, I could control the suction power and duration.

I vowed to never use the bulb again. And I asked Sweden to forgive me for questioning the awesomeness of one of its products.

FlagSweden_Tack
The internet tells me that Tack is Swedish for Thank you.

I've been to an Ikea—I should have known better and trusted that the NoseFrida would be awesome too. Thank you, Sweden.


I Ain't Afraid of No Nose

Worried about the snot reaching your mouth? You shouldn't. Sure, it's a normal thought to have—I had it—so let me put your mind at ease. In my experience, the snot doesn't travel more than an inch at most up the tube, which is basically the conical tip of the tube (the end that touches the nostril). And even if you miraculously shot it up further, there's a blue filter. Nothing is getting past that blue filter.

Gandalf_YouShallNotPass
He may as well be your blue filter.

Let me continue to put your mind at ease by saying that after the blue, Gandalf-like filter, there's a long bendy tube between it and the mouthpiece. You would basically have to remove the filter and intentionally be trying to make the booger pass through the whole device. And even if you had that intent for some crazy reason, I have serious doubts that it would be very possible to do it.

Want to see it in action? Here's me trying to get a particularly stubborn booger out of my baby girl's nose when she was about two months old. I don't think I used saline solution before this attempt, so I suggest checking out how to make your own at the end of this article. It can make the process take mere seconds.


I think it's worth noting how calm she is once her nose is cleared. I also advise having a tissue or square of toilet paper nearby so you can wipe the booger from the edge of the baby's nose or make a slight blunted point like I did if it is ever-so-slightly inside of the nostril. But please note: I would not advise using the tissue to be inserted up baby's nose. It is simply to swipe the booger away.

If you need any other extra convincing, then I recommend watching this product review that I found on YouTube. It lists both pros and cons, but the cons are accurately minimal.


SaltMugMeasuringSpoonDIY Saline Solution


Now, let's move on to the DIY saline solution. It's simple.


What you'll need:
  • ½ cup water
  •  teaspoon of salt


What you'll do:

Microwave the water in a microwave-safe mug for 20–30 seconds so it's nice and warm/hot. Mix in the salt until it dissolves. Let the water cool. Use. That's it.

I ended up using one of my cleaned breast milk storage containers (the kind with the twist on lid) to store the saline solution. I just labeled the top with an erasable marker. I also used a small 1mL eyedropper, which I believe I had gotten in a pack at an arts and crafts store.

IMPORTANT NOTE: Do not stick the eyedropper into baby's nose. Simply hover above and drop one or two drops in each nostril. It helps to use a small pillow or Boppy to slightly recline baby's head back. Also, it's important not to double dip your dropper into the saline mixture. You shouldn't need more than one eyedropper's full anyway. And if the dropper accidentally touched part of baby's face, you could be introducing germs back into the solution. Gross. With this in mind, be sure to clean the dropper between uses.

I would maybe consider dumping the solution and making a new one every so often to ensure germs aren't hanging out in there before your next trip to Baby Nose Town.


One Last Thought...

One other product that I think is worth mentioning is a humidifier for baby's room when he/she is sleeping. It definitely helps to combat the cold-weather dry air. There are a lot of adorable baby-targeted designs, but we just used the adult humidifier that we already owned—so boring. Look at what I'm missing out on.
CraneHumidifiers_Adorables
Crane Adorables Humidifiers

UPDATE (8/16/2016): Our humidifier broke, and we're now the proud owners of that cute, red dragon pictured above!

Thursday, November 12, 2015

Mint Chocolate Peanut Butter Balls

KellyKapowski_chocolateBalls
Kelly Kapowski serving up a delicious, chocolatey treat

Ever wonder what happened to Kelly Kapowski?

Well, she (and by she, I mean the actual actress who played her, Tiffani Thiessan) has her own cooking show now on Cooking Channel. It's called Dinner at Tiffani's (good, right?), and I believe the whole concept is her inviting celebrity friends over for a dinner party and serving the delicious meals that are explained to the viewers.

DinnerAtTiffanis


I have to admit that I haven't actually watched the show, but I did find one of her recipes online for peanut butter chocolate bites, and I will forever thank her.

I made a few modifications to it and turned peanut butter chocolate bites into...


MintChocolatePeanutButterBalls_tall
... MINT CHOCOLATE PEANUT BUTTER BALLS.

That's right. And THEY. ARE. DELICIOUS.

They're one of my favorite treats ever, and it's a no-bake recipe.
Make them. Make them twice.

Here's how.


INGREDIENTS

Peanut Butter Filling:

  • 2-½ cups peanut butter (smooth or chunky is your choice)
  • 1/2 cup unsalted butter, room temperature (aka one stick of butter)
  • 2 teaspoons vanilla
  • 3 cups confectioners' sugar

Chocolate Coating:

  • One 12 ounce bag of dark cocoa mint candy melts*
  • 2-½ tablespoons of coconut oil


*You can use whatever kind of chocolate in candy melt or chip form, but once I discovered that Wilton made dark cocoa mint melts, I knew that was the only way for me to go. You can get them at Michael's Arts and Crafts stores. In fact, go to their website, click on the coupons link at the very top and use the 40% off any regular priced item that they almost always have.

UPDATE (5/2018): Michael's does not seem to carry the mint chocolate candy melts anymore. While plain chocolate is fine and good, I recommend adding peppermint extract to the melted chocolate mixture (start with a couple of drops and add to taste).


INSTRUCTIONS

Mix the peanut butter, butter and vanilla together. I recommend a mixer with the paddle attachment on a low setting. Gradually add the confectioners' sugar while it is mixing.

Once thoroughly meshed, roll filling into 1–1-1/2 inch balls and place on a baking sheet covered with parchment paper (or with a non-stick silicone baking mat, which is what I have and totally love).

PeanutButterBalls_filling
I had to change the name from bites to balls since they're too big for one bite (and balls is funnier**)

Stick balls into refrigerator for a few minutes while you make the chocolate coating.

Melting the chocolate in a double boiler (or double boiler substitute***) is, in my opinion, the best way to do your melting. The candy melts packaging says microwaving is an option, but that's never ended well for me. With a double boiler, you can't overheat your chocolate, and you can keep it nice and warm and melty so it stays consistent and smooth while dipping stuff into it.

ChocolateCoatedBalls
Shiny and ready to cool

Whatever your method, melt the chocolate and coconut oil together.

Then get those peanut butter balls out of the refrigerator and roll them in the chocolate using a spoon. Return to the parchment/silicone baking mat once they're nicely coated. If you have extra chocolate, you can drizzle it over the balls if it's just a little or chocolate-coat some other foods (large marshmallows were my choice when I had too much left over the first time I made these).

Refrigerate for an hour or so until they've cooled and the chocolate has hardened. It'll be hard to resist, so clean up in the meantime by licking any spoons and bowls that have chocolate on them. Of course, make sure they're cool enough—safety first!


Now enjoy the crap out of them. You've earned it by making them.


FinishedBalls
Finished and waiting to be devoured

**Seriously, balls is funnier. I most recently made these for a baby shower, and since she was having a boy, having something in ball form just felt extremely appropriate. Don't pretend like you're above this kind of humor. We've all laughed at it before.


***My double boiler substitute consists of a saucepan, colander that fits into it and a glass bowl that can hold all of the chocolate.

SaucePanColanderBowl


I fill the water so it's no higher than an inch up from the bottom of the glass bowl. If the water ends up getting bubbly and boily, then I don't want it to get into the glass bowl with the chocolate. Ideally, this shouldn't happen since I like to keep the heat at a low-medium setting.


Friday, November 6, 2015

Ocean in a Bottle


I never did this in school, but the internet told me about it.


You can make a cool, bubbly ocean in a plastic bottle for your kids to Ooo and Aaaah at—or stare blankly at in wonder if they're around my children's ages, which is one.


What you’ll need:

  • Clear plastic bottle (I like the idea of using a mouthwash bottle or anything that has a child-safety lid. I used a 1.5 Listerine bottle, but any sized clear, plastic bottle is fine.)
  • Water
  • Blue food coloring
  • Canola/vegetable Oil
  • Funnel (optional: for easier pouring of stuff into bottle)


What you’ll do:


Oil bubbling after being poured in
  • Rinse out the bottle and remove the label.
  • Fill about ⅓ to ½ of bottle with water
  • Mix in food coloring
    • You'll probably only need about 2-3 drops. I added one drop of green to get a more blue-green ocean color
    • If your water is too dark, just dilute it with more water and set the extra aside in case you decide you'd like to top off the bottle with it
  • Fill the rest (or as much as you want) with oil
  • Enjoy the shaking and swishing


After swishing it a few times in front of Winry and Henry, it became baby-approved.


And now some more photos I took of the process:


Adding food coloring - side
Swirling food coloring


Adding food coloring - top
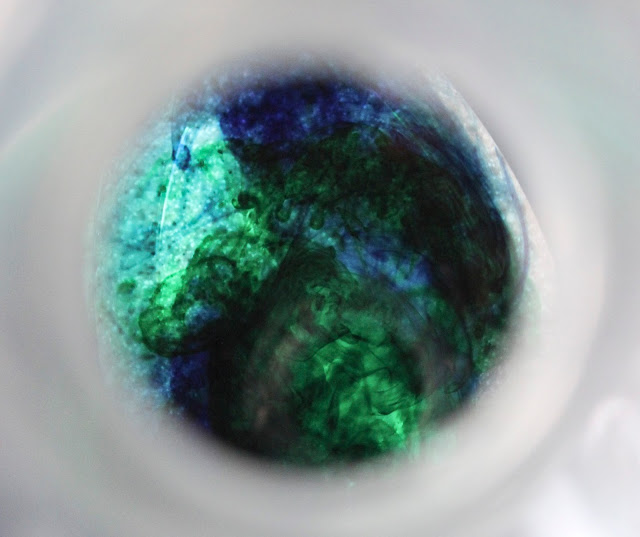
The food coloring swirls, view from the mouth of the bottle
  
Ocean bubbles - close-up
Close-up of bubbling ocean

Wednesday, November 4, 2015

Babies' First* Halloween

This was actually their second Halloween, but this was the first year we recognized the holiday. Since the kids were born in October, they were only a few weeks old when their first Halloween rolled around. And for those of you who are parents, especially parents of multiples, then you know those first few weeks are just sort of a blur of feed, burp, change, sleep, repeat.

Henry and Winry being sleepy newborns for their first Halloween, October 2014

I’m pretty sure that my husband and I were not even aware that Halloween happened until it passed us by. Do I regret it? No. Keeping my babies (and my sanity) alive were the priority. Putting that little bit of extra pressure to make sure I dressed them up and took photos probably would have broken me at that point. So my advice to all new parents is to do something for Halloween only if you really, really want to for yourself. If your family doesn’t understand why your child(ren) aren’t wearing something cute on Facebook, then you need to fire your family. Besides, there are plenty of years of adorable costumes in the future.


I had actually ordered some custom infant t-shirts in case I did need a costume for the kids but didn’t end up taking photos with them wearing it because of what I explained previously. Still, here are the cute twin outfits that I had planned and as a bonus, could be used on non-Halloween occasions. (Second bonus: I may cut the PB&J images out and sew them onto something else. I haven’t decided on this yet. But when I do, I’ll try to post a tutorial in case others want to do something similar.)


PB shirt
Henry was the peanut butter.
And J Shirt
Winry was my little jelly.
So if you need something easy, this is a good way to go. Either get blank onesies/shirts and paint or puffy paint them yourself or get a digital print of what you want. I used UberPrints.com. Why? Because they have great turn around, fantastic customer service, an easy-to-use online studio, oh, and I work there, so I already knew that I’d get something awesome.

My only warning is that the Rabbit Skins infant t-shirt product seemed to run a little small, and I would recommend a onesie instead for more accurate sizing. Although, like I said, our customer service is great, and you could always call and talk to a rep about any sizing concerns in case the sizing chart online isn’t helpful enough.

This year, I went with option one and puffy painted something onto a couple of black romper onesies. My idea was to paint the Big and Little Dipper constellations on the onesies (Henry was born first and is a little bigger than Winry, so making him the Big Dipper was an easy choice). Meanwhile, Mat (the husband) and I were astronomers.


Astromomer and Dippers
Astromomer (mom astronomer)
with her Big and Li'l Dippers, Oct. 2015
Big Dipper and Dad 
Big Dipper and Dad, October 2015.
Li'l Dipper and Dad
Li'l Dipper and Dad, October 2015


This was an easy costume for us as well since we just wore button-up shirts and ties and lab coats that I already had. Why did I already have lab coats? My dad is a microbiologist and brought some home years ago for Halloween costumes when I was a kid. Don’t even get me started on how awesome it was that he could bring dry ice home for Halloween too. Score!


If, however, you don’t have scientist connections, then I found a couple of great DIY lab coat tutorials for the sewing and non-sewing types. These tutorials are for children, but I’m sure if you get an extra bigger-than-you size, you can make the proper modifications for an adult size. Or, like I said, just be or know a scientist, whichever is most convenient.

Lab Coat - Sew
For those who want to sew, using a men's button-down shirt


Lab Coat - No Sew
Use a white t-shirt for a quick and easy lab coat.

I also made a couple of retractable telescopes out of cardboard tubes as an astronomer accessory for my husband and I. Since I like to think of myself as a practical crafter, my intent was that the kids could play with them when they're older.

I found the original tutorial here.


Retractable Telescope
Retractable Telescope Tutorial 

Mine is decorated with paper (scrapbooking paper that you can find at a craft store is great because it's thin and comes in a variety of decorations) instead of paint, and I used buttons and those little twist ties that you can get off of a loaf of bread instead of the brads. I also added a strap by punching holes near the end and securing the strap's ends inside with tape.


My Retractable Telescopes
My astronomer version of the retractable telescopes

My one mistake was not following the directions closely enough and putting the second sliding slit on the skinniest tube instead of the middle one. Turns out that it was important since I can't secure that last set of button/twist ties to the tube since it needs to be able to slide. It still works, but I have to slide with care.

I also couldn't help myself this year and got a couple of small pumpkins for the babies. My practical argument is that I can cook the pumpkins afterward--maybe even into some baby food, which is why I chose to paint them with water-soluble acrylic paint instead of carving them.


Mario Boo Pumpkins
Shy and not-so-shy Mario Boo pumpkins, October 2015

(Helpful pumpkin preservation tip: spritz the outside of the pumpkin with diluted vinegar and wipe off with a cloth. It kills the bacteria that want to make your pumpkin moldy and sad while avoiding chemicals that would make the pumpkin inedible later.)

Monday, November 2, 2015

Why It Had to Be Two

I thought that I would start my first post with an explanation of my "It Had to Be Two" title. The quick explanation is that I am a mother of fraternal boy and girl twins.

Winry and Henry, One Day Old, October 2014

The longer explanation is that Mother of Twins (as an alternative to Mother of Dragons--because, yes, I love me some Game of Thrones) was taken. I suppose Mother of Triplets would be a more appropriate reference since Daenerys has three dragons. So really, it's better this way.

Mother of Dragons by Yama Orce, digital art, yamaorce.deviantart.com

After cursing the blogger who stole this name and then realizing it was unlikely to be available with or without Game of Thrones, I remembered a song parody that I was going to try to make for my children. During their infancy, I sang them whatever calm, melodic song that would pop into my head, including "It Had to Be You." Obviously, you then change the last word to Two, and the title is explained.

Have I made the parody yet? No. Will I post it when I finally do? Yes.


And on one final note, "It Had to Be You" has been sung by many a great artist including Frank Sinatra, Billie Holiday and Ella Fitzgerald with Louis Armstrong, but the singer I associate most with this song is Marla Hooch because I also love me some League of Their Own.