Friday, June 29, 2018

D.I.Y. First-Aid Travel Kit

Having a first-aid kit for the car is not an idea exclusive to parents, but it definitely did not occur to me to make one until we took our then two-year-olds on a long car trip last summer.

Now, it gives me an extra sense of security every time we go out in the car, and it already paid off when my son scrapped his knee in a parking lot and needed a quick bandage. I felt so prepared and proud!

First-AidKitContents


Contents of my first-aid kit:

  1. Cotton swabs*
  2. Cotton balls*
  3. Bandages*
  4. Adhesive medical tape
  5. Wrapped sterile pads*
  6. Antibiotic cream
  7. Wrapped gauze
  8. Tylenol or some kind of pain reliever**—you never know when a headache will hit.
  9. Benadryl or some kind of antihistamine**—I have a nut allergy and never go anywhere without this stuff.
  10. Small emery boards—honestly, I mostly keep this around because it came with an infant kit, but if you're traveling with infants, it is the only way to deal with overgrown nails.
  11. Nail trimmer—may a hangnail never ruin your day again!
  12. Tweezers
  13. Travel-sized tissues
  14. Floss—when food gets stuck in my teeth, I don't trust anything pointy like a toothpick when in a moving vehicle.
  15. Alcohol wipes—alcohol-free cleansing wipes exist too.
  16. Compact mirror
  17. Small scissors—handy for the gauze and tape
*I like to keep these items in a plastic, sealable bag to ensure they stay dry.
**These are for the 12-year and older crowd (as noted on containers). And be mindful of expiration dates.

All of these items fit easily in a small travel bag that can go in my car's glove compartment, my purse or a diaper bag.


NOTE: Some items, like the creams and pills, have instructions to be stored in specific temperature ranges and are not ideal to be left in the car all year round.

A few other items to consider:
  1. Hand sanitizer—I keep a small container in my purse instead.
  2. Hydrocortisone cream—for bug bites, poison ivy, etc.
  3. Instant cold packs—many stores sell these in larger, more expensive quantities. But I believe there is a 2-pack available at Target, and it will soon join my kit.
  4. Disposable sterile gloves
  5. Safety pins
  6. Digital thermometer
Feel free to comment below with other items you would consider adding.


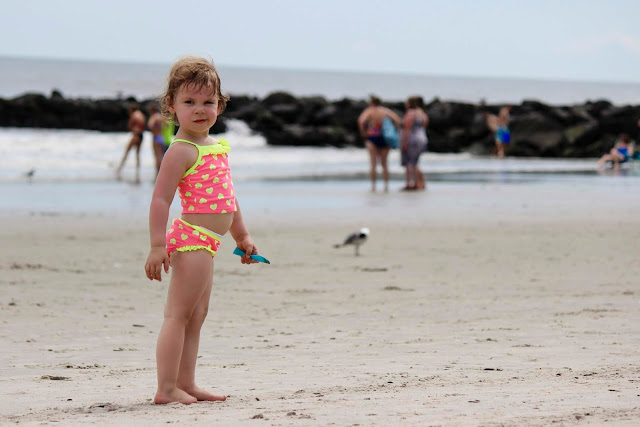
Having this first-aid travel kit made my kids' first trip to the beach last year a much more enjoyable one. May it make all of your trips less stressful and more enjoyable as well!

FirstBeachTrip_WinryHenry
Winry and Henry's first beach trip, July 2017

FirstBeachTrip_Winry
She's got all the 'tude... and a (plastic) knife!

FirstBeachTrip_Henry
Smelling his sand toes?


Friday, June 15, 2018

Sensibly Saving Sentiment: Repurpose Children's Drawings


Even though my twin toddlers' drawings are more on the abstract side, they're colorful and joyous, and I cannot bring myself to throw them out.


Instead, I repurpose them in a variety of projects. Here are just a few repurposing ideas:


Filling in the Difference When Framing

I used to work in custom framing, so I appreciate a good mat board, but I don't mind a simple substitute when it concerns smaller, tabletop photo frames.

Photo of my dad and me sometime in the 90s

Since my photo was not quite the right size for this frame, I simply cut the paper of my child's drawing to fit the frame and centered the photo to the paper with photo corners.*

*I recommend using acid-free photo corners or acid-free tape. Anything that's not acid-free will eat away at the photo over time. To go that extra step, you could even have your child draw on paper that you know is acid-free.


Fold Them Up into Decorations

I love using origami to decorate the house for my kids' birthday or holidays. Last year, we had a butterfly birthday theme, but what's great is that I can now use those butterflies as decorations every spring (special thank you to my mother-in-law and sister-in-law for making all of these beautiful butterflies and to my mother for sparking my love of origami)!

folded butterfly
Instructions for this butterfly can be found here.

I even made an origami kusudama flower to add to the springtime fun.


What is neat about these is you can make a single flower (one piece of paper is used per petal) or a flower ball out of several flowers.

kusudama flower ball
Photo and instruction from this blog.

I'm slowly working my way up to making a flower ball of my own. This example used two 6-petal flowers and ten 5-petal flowers.

(6x2) + (5x10) = 62 pieces of paper

I have the paper. I just need the time.


When in Doubt, Mod Podge

My children's first drawings were used for this DIY lap desk.


I recently used Mod Podge to cover these old baking pans for a future DIY project.


For this project, I ripped up the paper into various shapes and sizes. Then I glued them to the surface with a cut piece of sponge and Mod Podge (be sure to overlap them). After it dries, apply one final coat of Mod Podge as a finish.


Glass ornaments are another ideal, smooth surface for this application.

mod podge ornaments

If you don't have any to spare, consider seeking some inexpensive ones out at a thrift store or waiting until after Christmas to get highly discounted ornaments at a place like Michael's or Target (that's what I did).


Decorate a Mason jar.


I use a small jar to hold my children's spoons. I didn't want to cover the whole jar because I love having the colors of the spoons show through, so I just decorated it with a small heart.

First, draw the heart on with an erasable marker. Then draw the heart again on the inside of the jar, using the heart you just drew as a template (it's too hard to draw the heart on the inside straight away). Erase the marker on the outside.


Tear one edge of the paper to match the outside edges of the heart. Use smaller pieces of paper to fill in any gaps left after focusing on the edge.

Wipe away excess Mod Podge from around the shape with a damp cloth before it dries on the glass. And don't forget to reapply one final coat of the Mod Podge after the pieces of paper are all applied and dry (of course, wipe away the excess Mod Podge again if necessary).


Add a little glitter glue or puffy paint as a finishing touch.